To create a patient portal and let your clients access it, follow these steps:
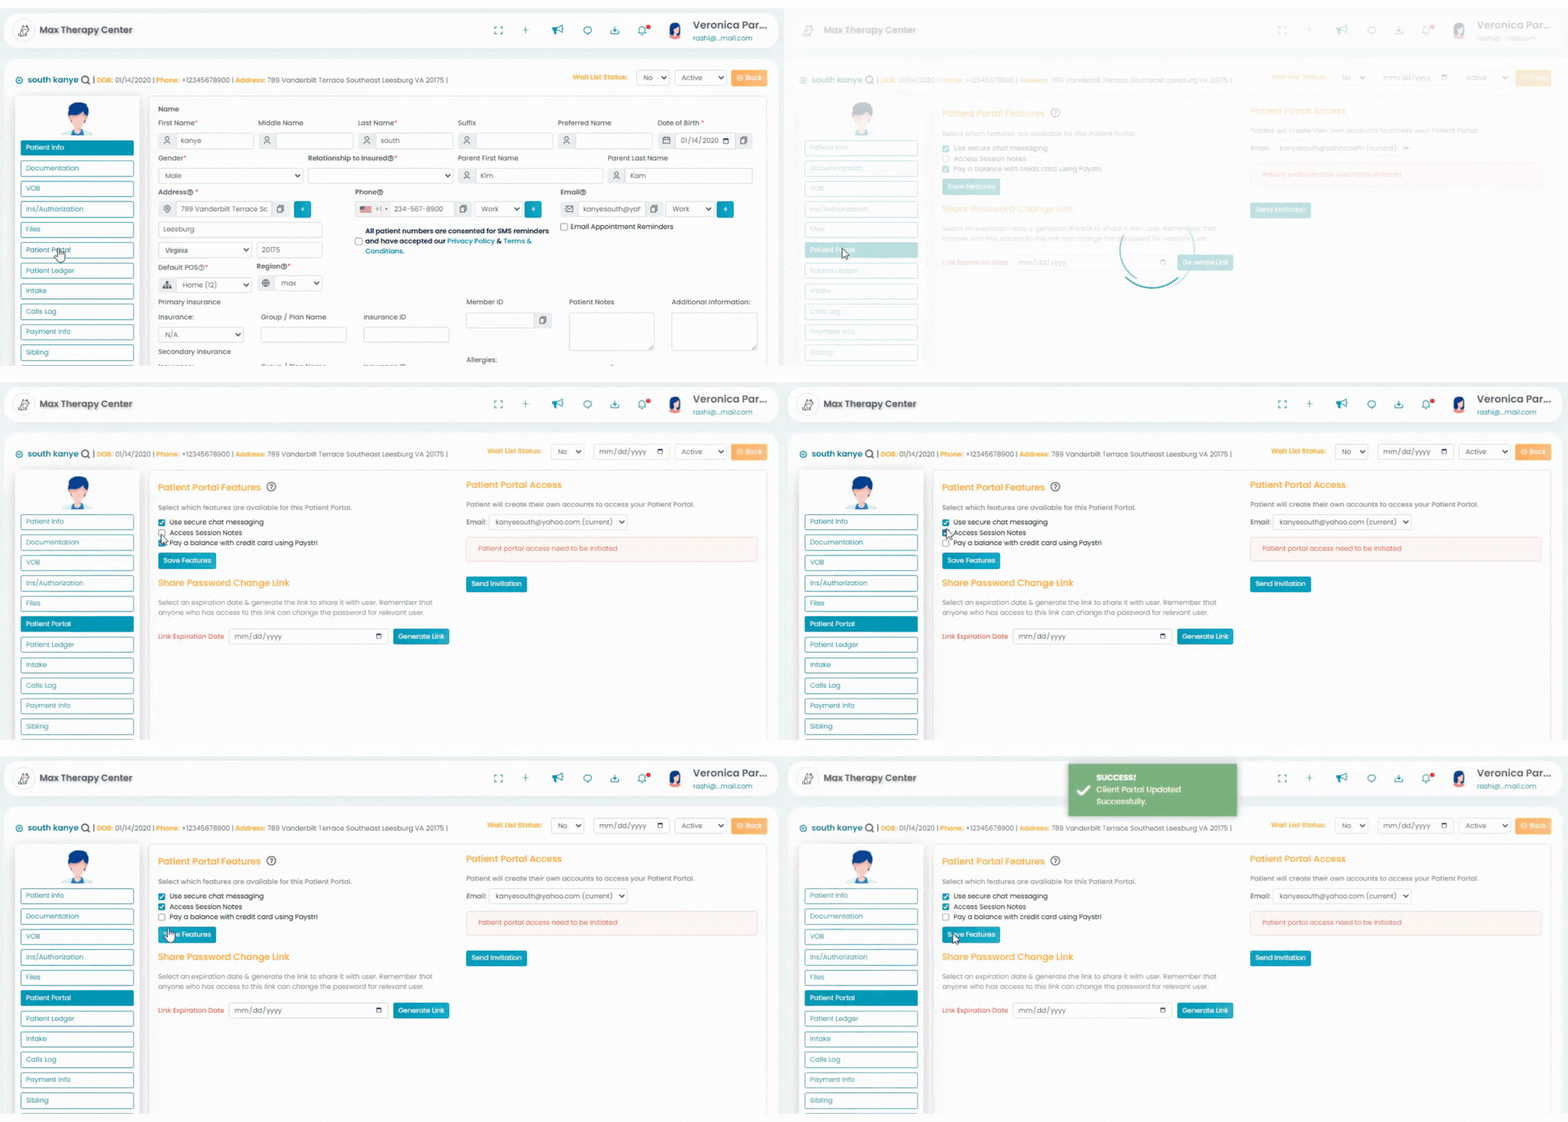
- Click on the Patient tab from the navigation bar. Locate and select the desired patient.
- Click on "Patient Portal" from the menu.
Manage Patient Portal Features

Select the features you wish to include in the patient portal. There are three key options available:
- Use secure messaging: Enable this option to allow the patients to communicate securely with clinic staff through the portal.
- Access billing documents: Choose this option to grant patients access to their invoices and allow them to upload documents like updated insurance cards.
- Pay a balance with a credit card using Stripe: Enable this option to allow patients to pay for services rendered using their credit card through Stripe.
Once you've chosen the necessary features for your clients, click the "Save Feature" button to confirm your selections.
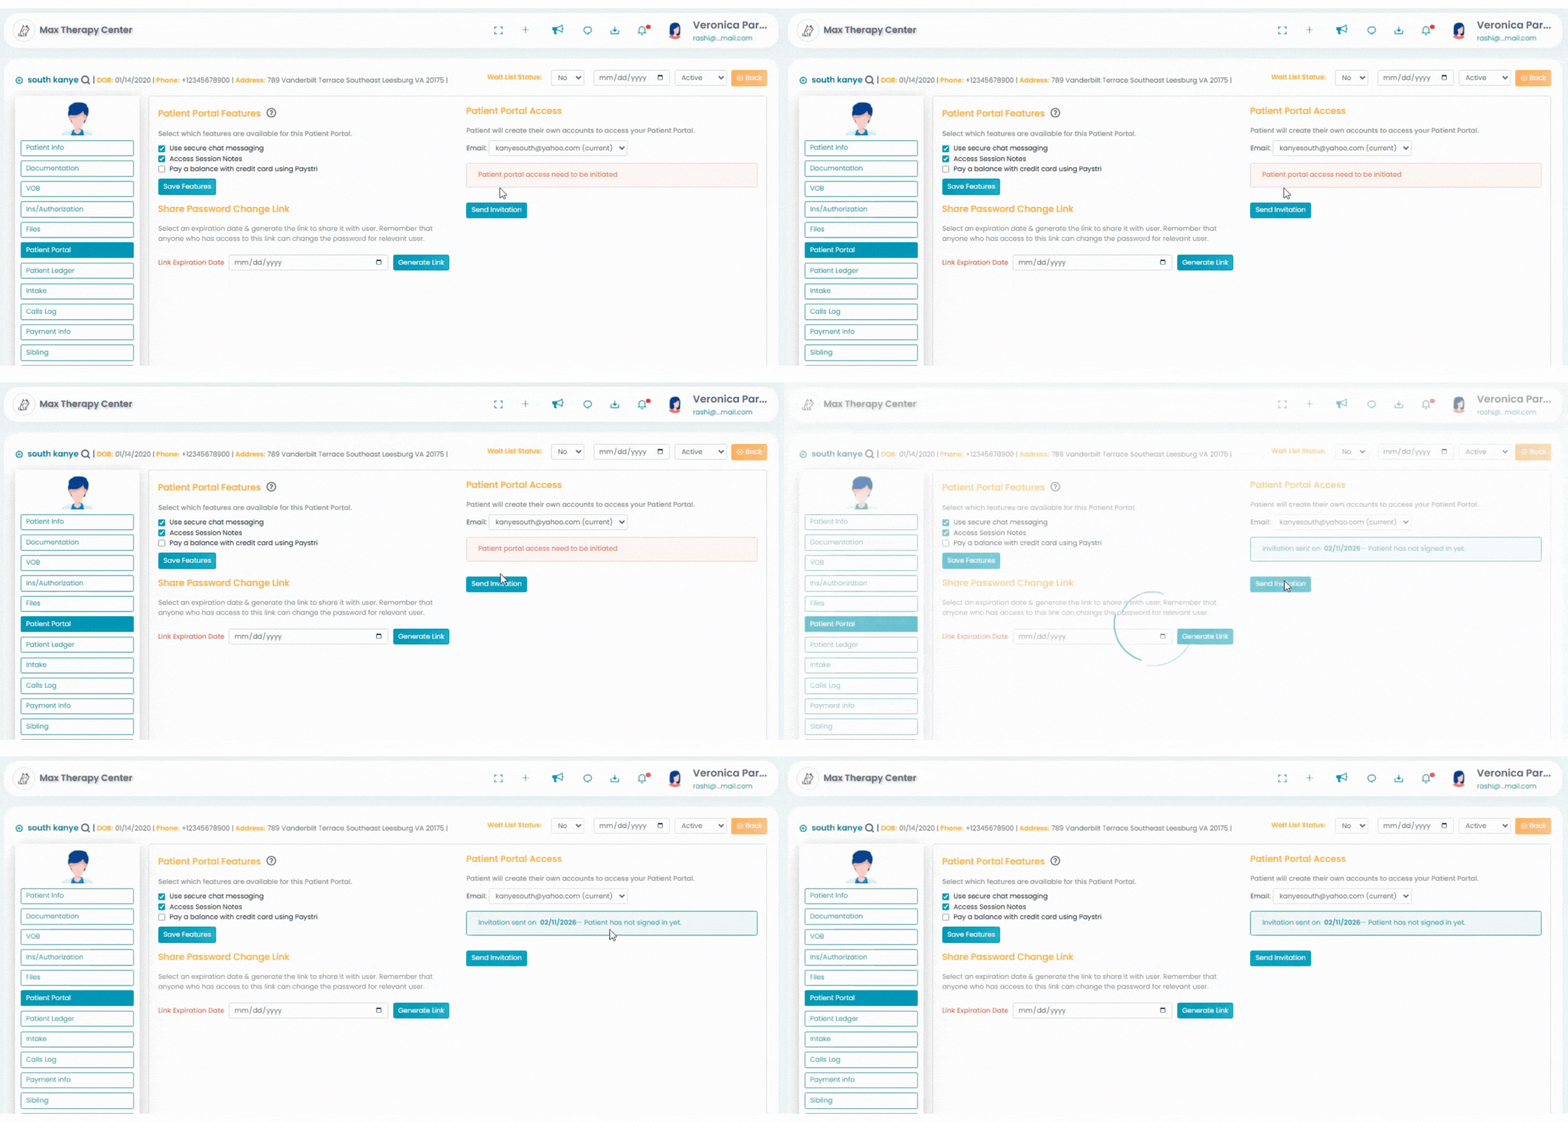
Share the Patient Portal Access:

- After saving the necessary features Click on the "Send Invitation" an mail will be sent to the mail ID added in the clients profile.
- With the mail the client and login and create the account for access.
- Your clients will receive an email containing a link to set up their account credentials. You can find more details about this process in Accessing Client Portal article.
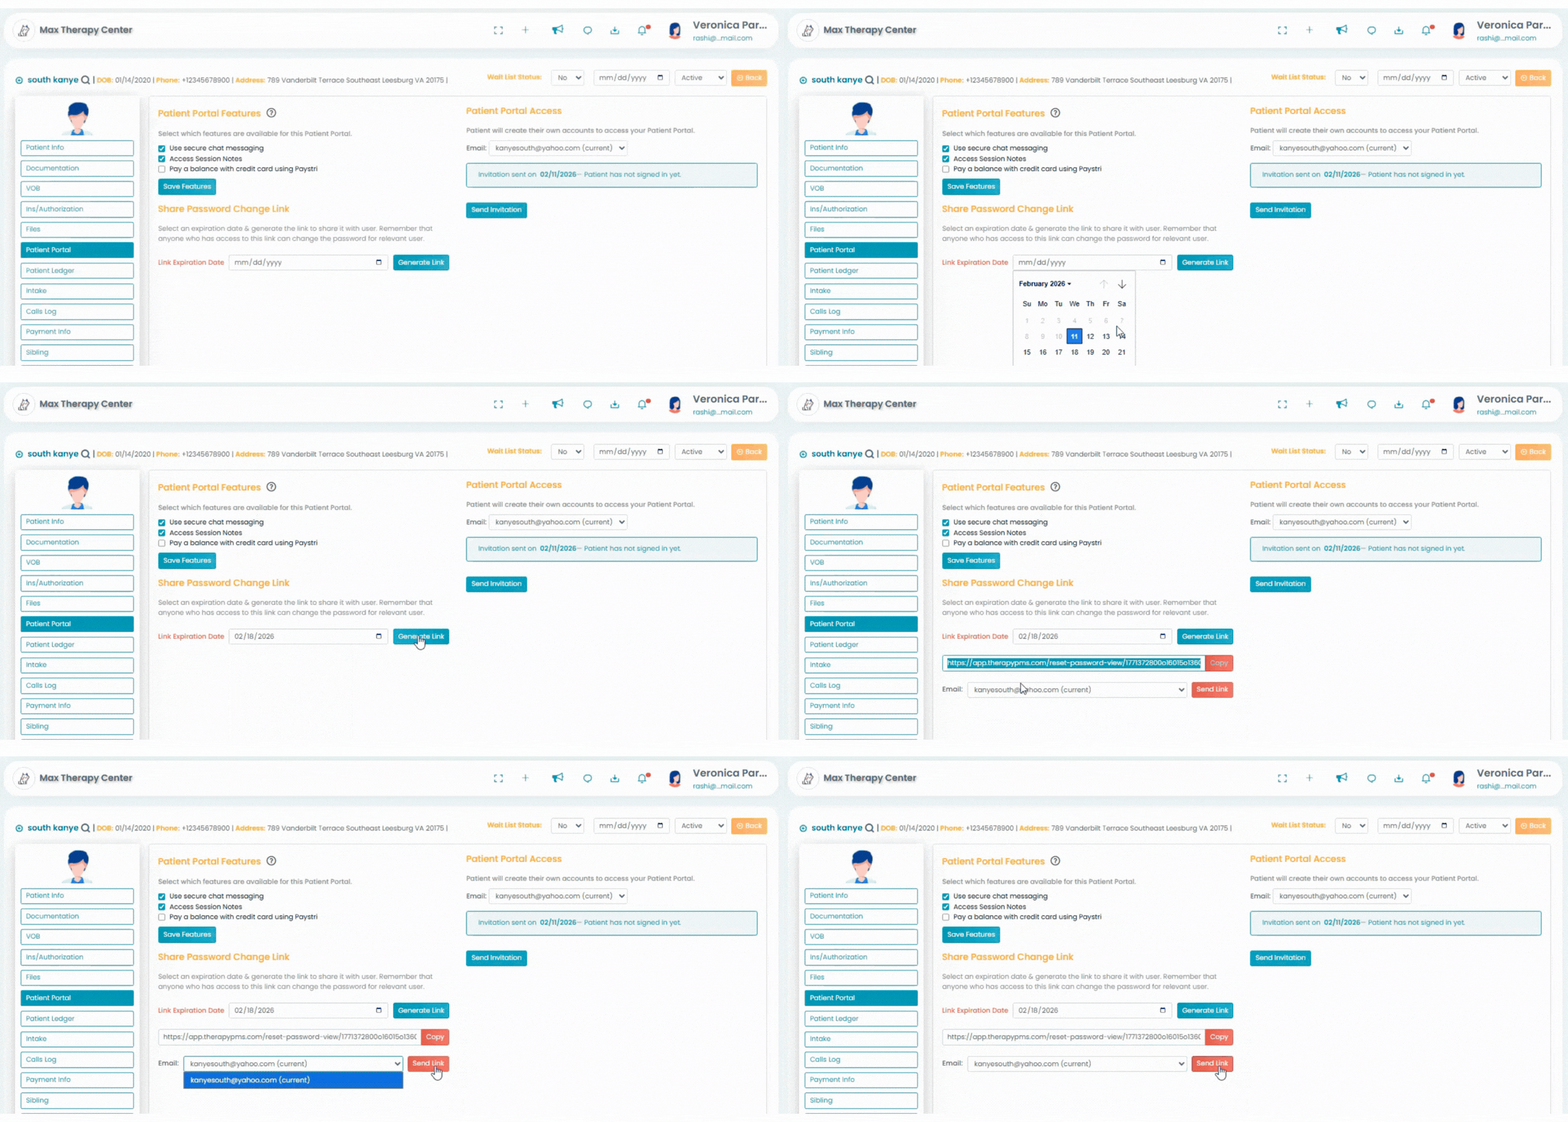
Share the Password Change Link:

- If a client forgets their password, you can share a link for them to reset the password.
- Set an expiration date by selecting a date from the calendar.
- Click on the "Generate Link" button. Share the generated password reset link with users who need to update their password.
