View the below appointment module walkthrough video for reference.
Appointments can be added from anywhere in the system with the "+" icon.
To create a new appointment, follow these steps:
- Click the "+" icon in the Quick Tray above, then select "Add Appointment".
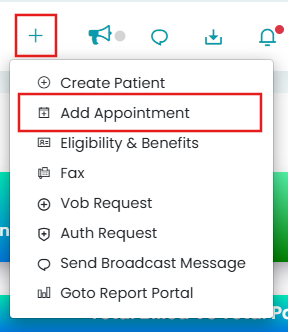
- Select the appointment type, edit the details, and save changes.
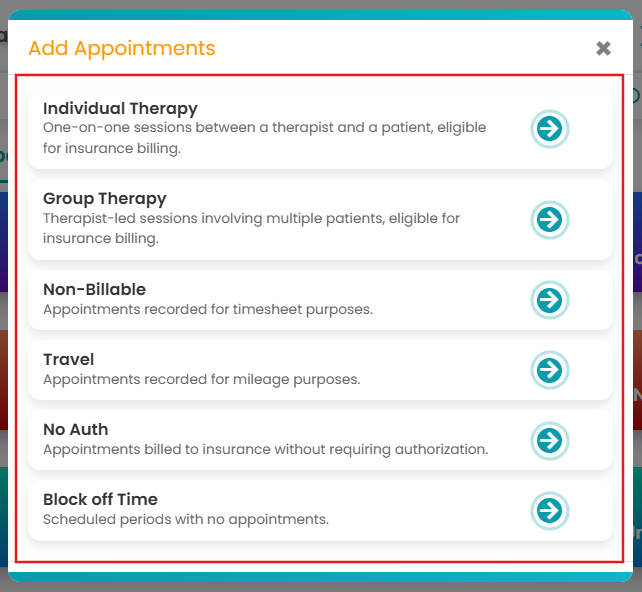
To learn more about how to create appointments under each category, click the following descriptions:
- Individual Therapy: Create one-on-one sessions with patients.
- Group Therapy: Create sessions with multiple clients.
- Non-Billable: Include services that are payable but not billable, such as training or office time.
- Travel: Record accurate mileage tracking for providers' payroll.
- No-Auth: Bill appointments to insurance without authorization, suitable for Patient/Guarantor Pay.
- Block Off Time: Schedule off time for yourselves!