This article explains how you can create an authorization or placeholder alongside adding insurance details.
Video Walkthrough
For a live demonstration of How To Create A New Authorization. Watch the Video below:
How to Create a New Authorization?
To create a new Authorization:1. Navigate to the Patients module.

2. Scroll down or use the search bar to find the desired patient.
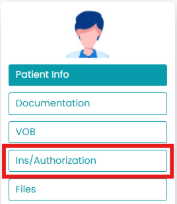
3. Under the selected patient’s profile, click on Ins/Authorization.
4. Click on the “+” symbol above the Authorization list. It will redirect you to the new screen.

5. Add the following information:
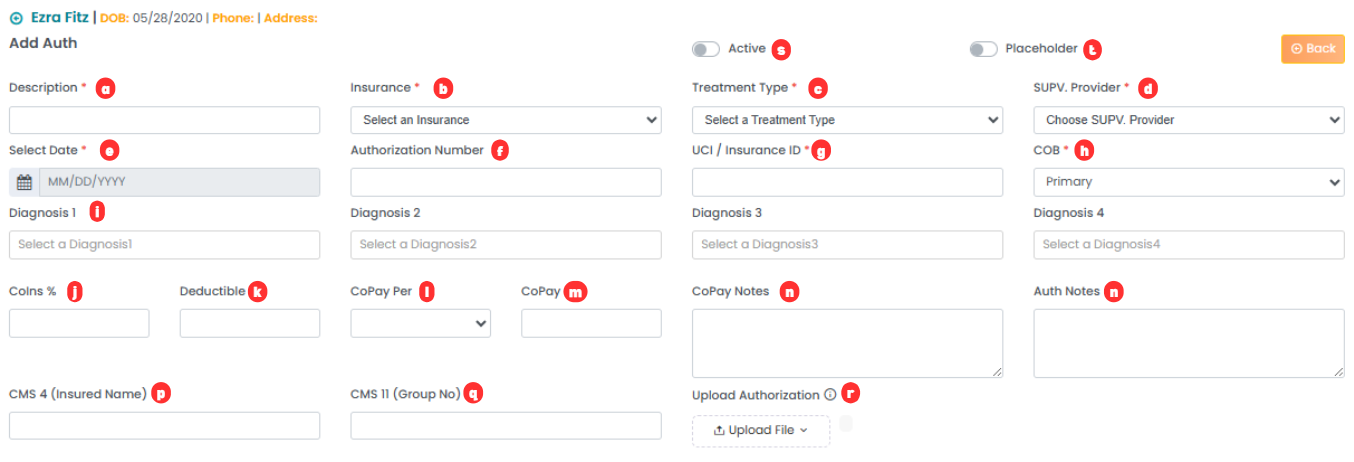
- Description: State the authorization name.
- Insurance: Select the insurance type from the drop-down.
- Treatment Type: Select the treatment type from the drop-down.
- SUPV. Provider: Select the supervising provider from the drop-down.
- Select Date: Select the start and end date of the authorization using the calendar.
- Authorization Number: Mention the authorization number.
- UCI/Insurance ID: Mention the insurance ID here.
- COB: Select whether the authorization is primary
- Diagnosis 1/2/3/4: Mention the diagnoses covered by the authorization.
- Coins %: Mention the percentage of coins.
- Deductible: Mention deductibles for this authorization.
- CoPay Per: Select the copay using the drop-down.
- CoPay: Mention the CoPay for this authorization.
- CoPay Notes: Mention any notes regarding the CoPay here.
- Auth Notes: Mention the notes for the authorization here.
- CMS 4 (Insured Name): Mention the insured name here.
- CMS 11 (Group Number): Mention the group number here.
- Upload Authorization: Upload the file from your computer.
- Active Toggle: Turn this on to mark the authorization as active.
- Placeholder Toggle: Turn this on to mark the authorization as a placeholder. This allows scheduling using this authorization, but billing will be disabled. Turn it off to start billing.
Adding Secondary Authorization (Optional)
The above steps enable you to create a primary authorization. For adding secondary insurance details, please follow the steps below:
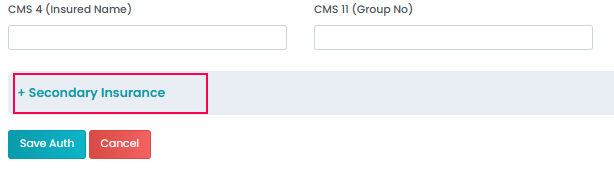
1. Click on “+ Secondary Insurance” to maximize the section.
2. Add the following information:

- Secondary Insurance: Select the secondary insurance type from the drop-down.
- Secondary UCI/Insurance ID: Mention the secondary insurance ID here.
- Secondary Authorization Number: Mention the secondary authorization number here.
- Relation to Insured: Select the type of relation with the insured person from the drop-down.
- Upload Secondary Authorization: Upload the file from your computer.
4. Save changes.
For a live demonstration of How To Create A New Authorization. Watch the Video below: