This article explains how you can use the Manage Statement Tab in Patient Statement module - print, email invoice and complete payment with credit card.
This is the 2nd step in patient statement processing. After generating the invoice, admins can make a payment in three different ways:
- Patient Credit Card: For patients whose credit cards have been added to the system.
- Charge Credit: For complete payment with created deposits in the admin portal.
- Generate Payment URL link: For patients without a card added to TherapyPM.
How to Manage Patient Statements?
- Navigate to Billing > Patient Statement.
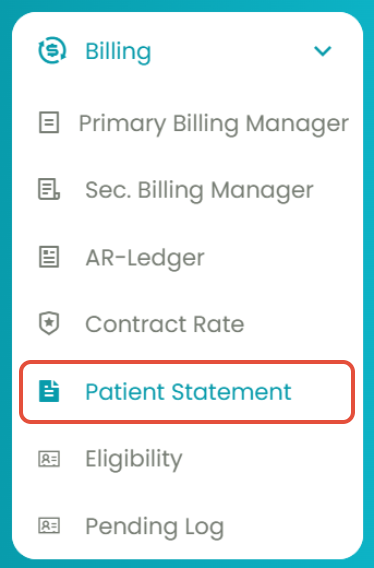
- Select the 2nd tab: Manage Statement(s).

- Use the Sort By filter to generate a patient statements table - Invoice, Patients, Date Range, and Date of Submission.
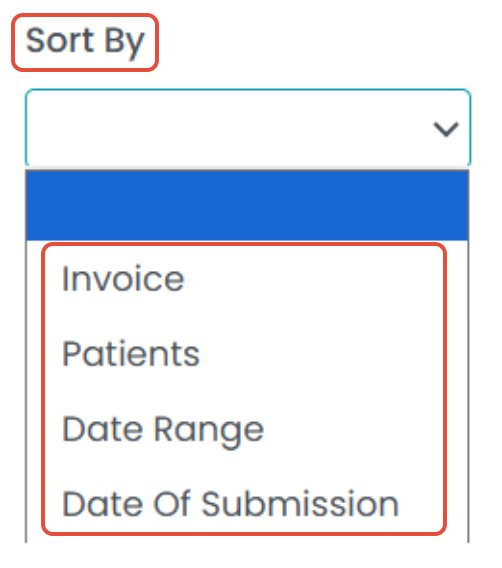
- Based on the selected option, the "Paid Status" drop-down will appear. The corresponding fields will adjust to show either "Invoice," "Patients," "Date," or "Submitted Date" depending on your choice.

- The generated Patient Statement(s) table consists of the following information:

- Invoice: Shows your invoice number. (Clicking on it will redirect you to your invoice.)
- Patient: Shows the patient's name. (Clicking on it will redirect you to the patient's profile.)
- Date Range: Shows the date range around which the invoice was created.
- Invoice Date: Shows the date on which the invoice was generated.
- Due Date: Shows the due date of the invoice.
- Total: Shows the total amount in the invoice.
- Extra: Shows other due amounts apart from the set amount in the invoice.
- Paid: Shows the amount paid by the patient.
- Action: Allows you to perform additional actions on your patient's invoice:

- Print Invoice: Redirects you to the printable invoice form. Download, print, edit, or view the invoice in multiple ways.
- Email Invoice: Email other providers or the practice admins regarding this invoice.
- Charge Credit: Apply the charges to the invoices.

- History: View the invoice history.
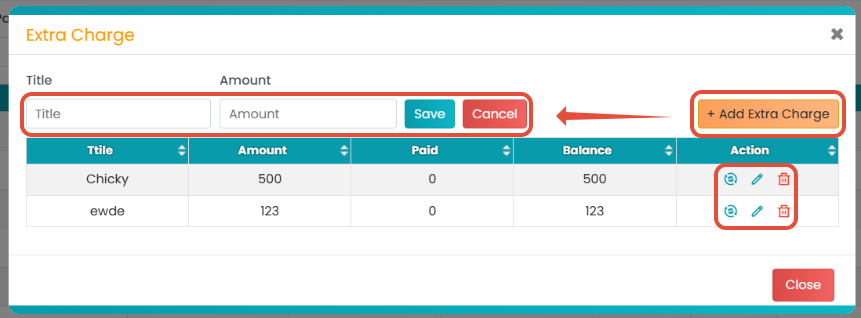
- Extra Charge(s): Add, edit, or delete extra charges for the invoice.
Action (...) Button Options: Click on the three dots under the Action column to choose these options:
Print invoice: Click on this action button to view the invoice which can be printed and downloaded.

Email invoice: Use this action button to email the selected invoice(s) to the client.

Get paid through CC: One method to pay the patient invoice is by completing the payment for the selected invoice(s). The patient must have a card on file for the payment to be processed successfully.

Get Payment URL: Clicking the option will copy the payment URL link. This link can be shared to complete the service payment. Paste the link in the web browser to view the payment screen.

Charge Credit: As you click on this option, a new pop-up will appear. In this screen, all the deposit(s) will be displayed. Click the Apply To Invoice button to apply the credit charge to the invoice, and then click the Go button. The credit amount applied will be the maximum that can be used from the deposit. For example, if the invoice amount is $30 and the deposit amount is $18, only $18 can be applied toward the invoice. Once the payment is applied, the invoice will appear as "paid" in the Manage Statement screen.

Drop-Down Option: On the bottom left, select the statements and choose an option from the drop-down menu.
Show Detail(s): Select the preferred statement(s) from the list by ticking the checkbox next to them. Then, choose the Show Detail(s) option from the drop-down menu and click on it. This will display the selected invoice(s) payment statement, and the generated table will include an option to retract the statement(s).

Update Due Date: This option allows you to update the due date for a single invoice or multiple invoices. Simply select the desired invoice(s) using the checkbox, then click on Update Due Date to apply the changes to all the selected invoice(s).
