This article explains how to view and manage the processed payrolls.Video Walkthrough
For a live demonstration on Payroll Processing Tab, watch the below video:
This is the 3rd step in the staff/provider payroll process.
- Navigate to Payroll > Processing Payroll.
- Click the Processed Payroll (Step-3) category.
- Depend on what the user selects in the Filter By option -
- For Pay Period: Choose the payroll submission period from the list.
- For Date Range: Select the date range.
- Select staff(s) from the drop-down list to process payroll and click the View button. The same step applies to selecting a pay period and a date range.
- After clicking the view button, the data table will be generated with the following information:
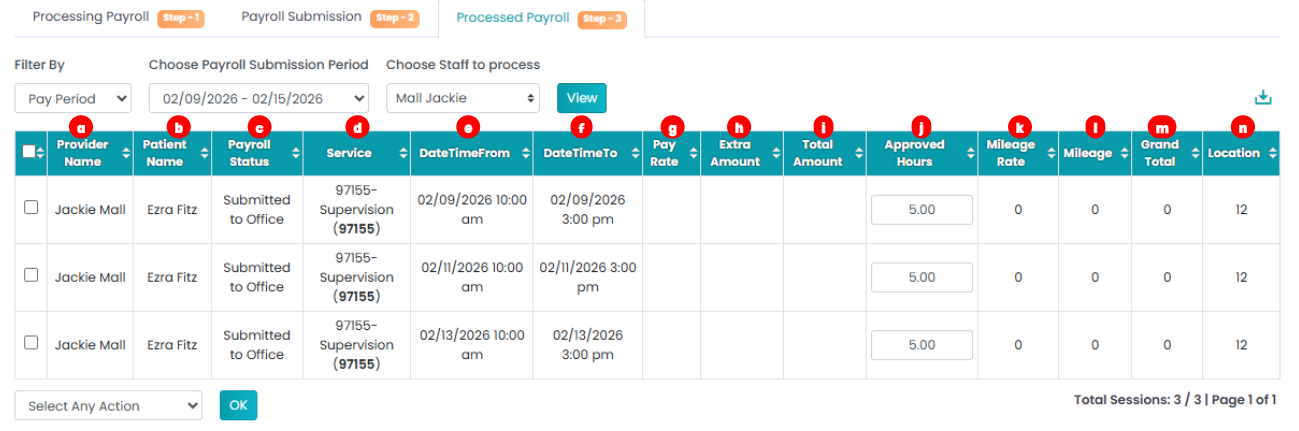
- Provider - The Service provider.
- Patient - The patient that attended the session.
- Payroll Status - The current status of the payroll.
- Service - The Description of the service that occurred.
- Date Time From - The start date and time of the session.
- Date Time To - The end date and time of the session.
- Pay rate - Payroll set Pay rate for the service or provider.
- Extra Amount - Any extra amount added while submitting timesheet will display in this column.
- Total Amount - The total amount of payroll set up will display here.
- Approved Hours - This field can be edited by adding in desired hours from calendar.
- Mileage Rate - The mileage rate for the travelled mileage.
- Mileage - The mileage travelled that has been entered will display in this column.
- Grand Total. - The gross amount to be paid.
- Location - Location of the service (POS).
- Click the Download tray on the top right corner to download the payroll processing list in CSV or EXCEL format.
- Drop-down option: Use the checkboxes in the data table to select the rows and use the drop-down option
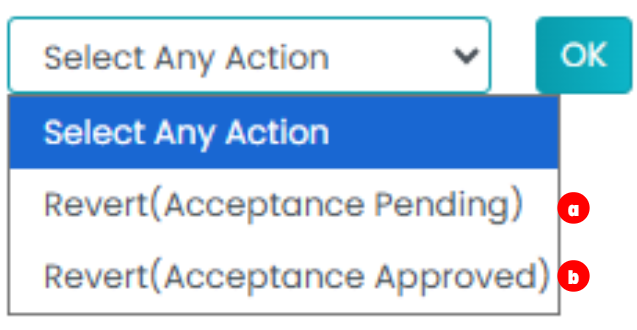
- Revert (Acceptance Pending) - Will move the line items to first step of payroll.
- Revert (Acceptance Approved) - Will move the line items to second step of payroll processing.