This article shows how you can manage the AR Ledger based on claims submitted per patient. You can view the total balances owed by patients and insurance payers for sessions. This helps maintain your practice’s financial health.
To effectively manage the AR Ledger Claim-Wise, please follow the steps below:
- Navigate to Billing, AR Ledger.
- Select the 1st tab: AR Ledger-Claim Wise.
- Apply the filters to generate the AR Ledger – Patient/Claim Number/Insurance. Select the date as well. For claims, enter the claim number and click View.
- The AR Ledger table consists of the following information:
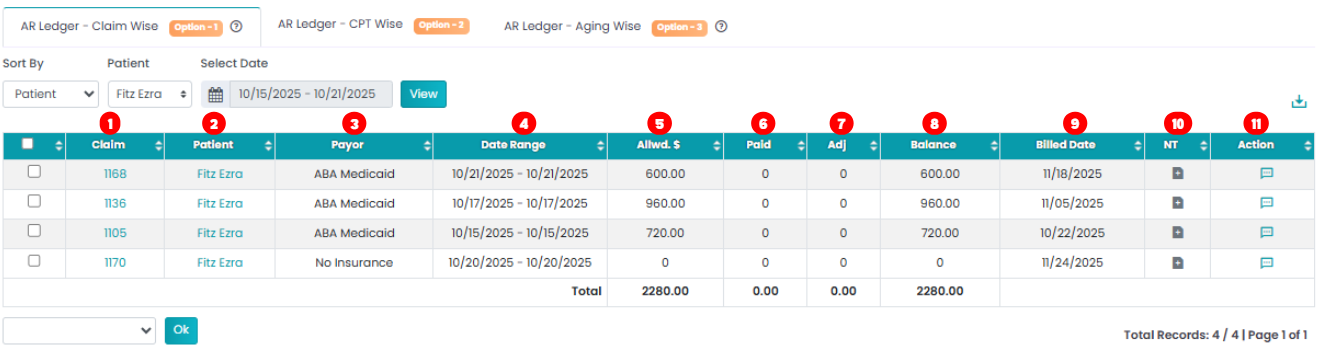
- Claim: Shows the claim number. (Clicking on it will redirect you to the HCFA form.)
- Patient: Shows the patient’s name. (Clicking on it will redirect you to the patient’s profile).
- Payor: Shows which insurance the patient used for paying.
- Date Range: Shows the insurance date range.
- Allowed $: Shows the amount charged for the session.
- Paid: Shows the amount paid by the patient.
- Adjustments: Shows adjustments made.
- Balance: Shows the remaining balance to be paid by the patient.
- Billed Date: Shows when the session was billed to the patient.
- NT: Shows notes. If a note exists, the icon appears colored.
- Action: Allows you to add comments related to the claim history.
Drop-Down Selection:
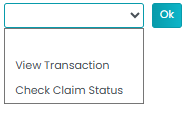
Use the drop-down below the table to perform further actions on the claims you have selected with the checkboxes:
- View Transaction: Shows you the entire transaction details pertaining to the selected claim.
- Check Claim Status: Allows you to view the claim’s status.