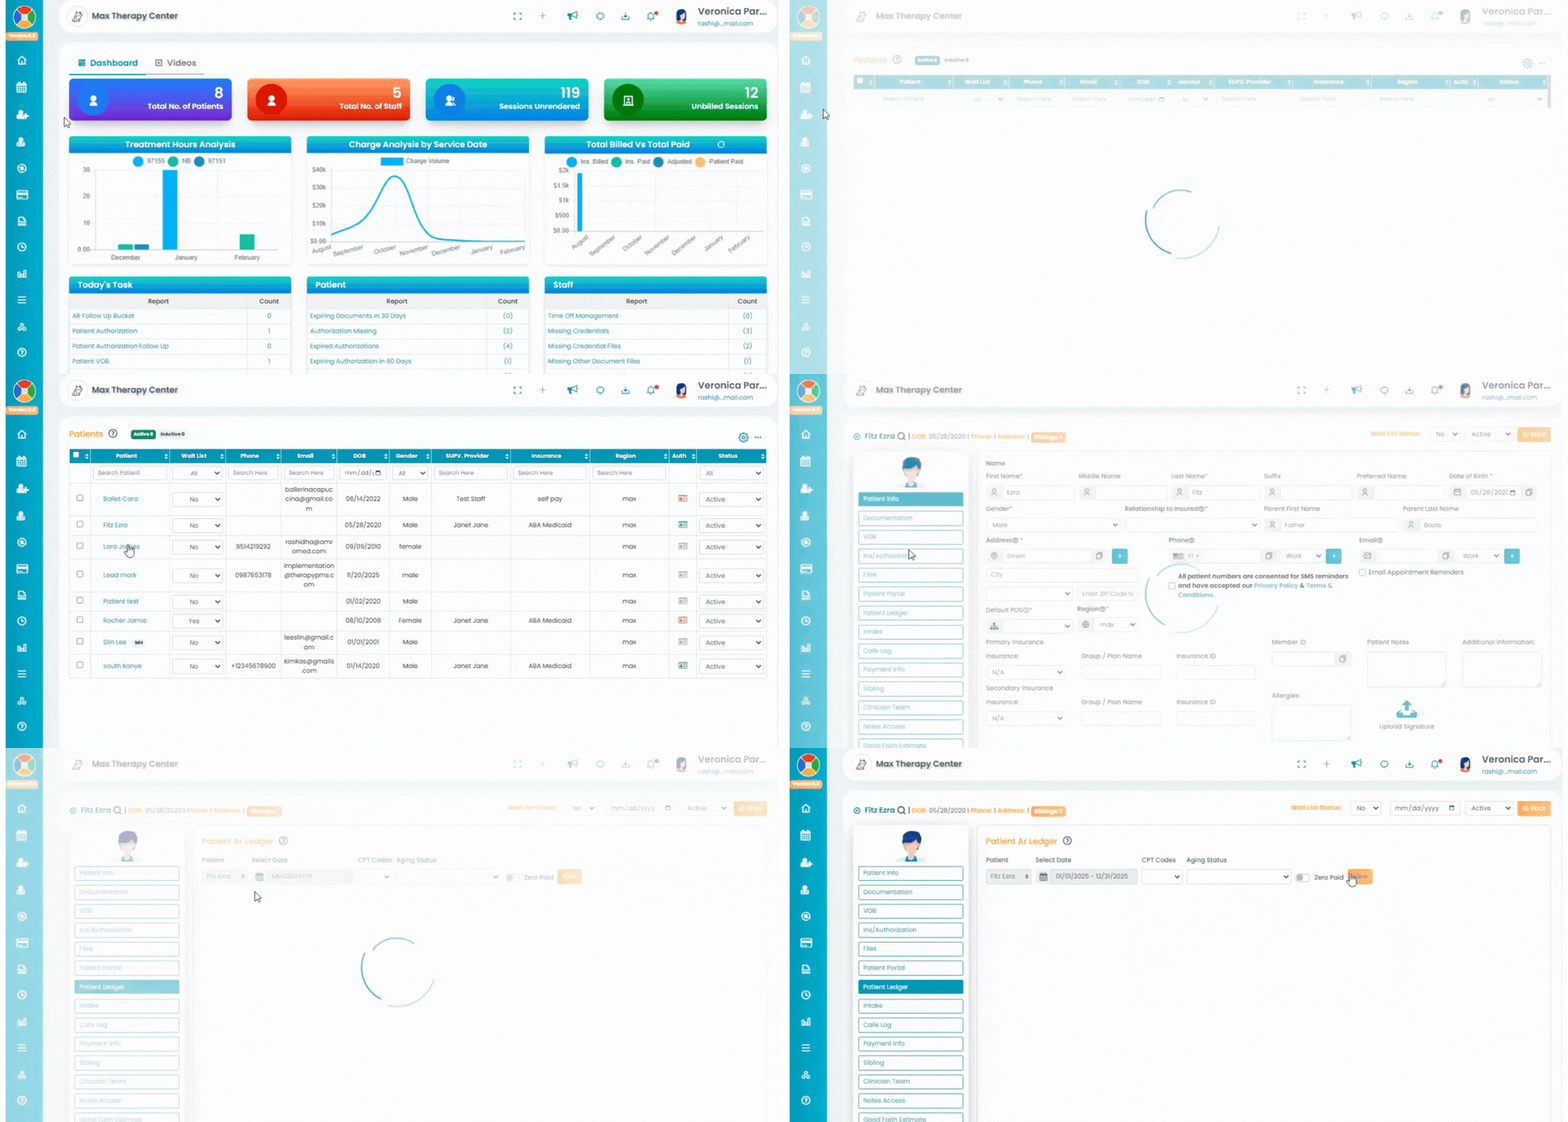
The patient ledger option provides information on the patient's current balances and payments.Access Patient Ledger

- Navigate to the left navigation bar. Go to Patients.
- Select a patient from the "Patients" screen.
- After selecting the patient, select the Patient Ledger option on the left, under the Patient Name.
- In the patient ledger option, you can navigate through the below fields/options to generate the patient AR ledger
- Patient: The name in this field will always default to the current patient.
- Select Date: Select the date range for the AR ledger generation.
- CPT Codes: An additional option to filter using CPT codes.
- Aging Status: Filter by various kinds of aging statuses - Corrected Claim, Provider Escalation, etc.
- Zero Paid: Toggling this option allows you to choose whether zero-paid balances are displayed in the list or not.
- View: Click the button to generate the AR ledger.
Manage Patient Ledger

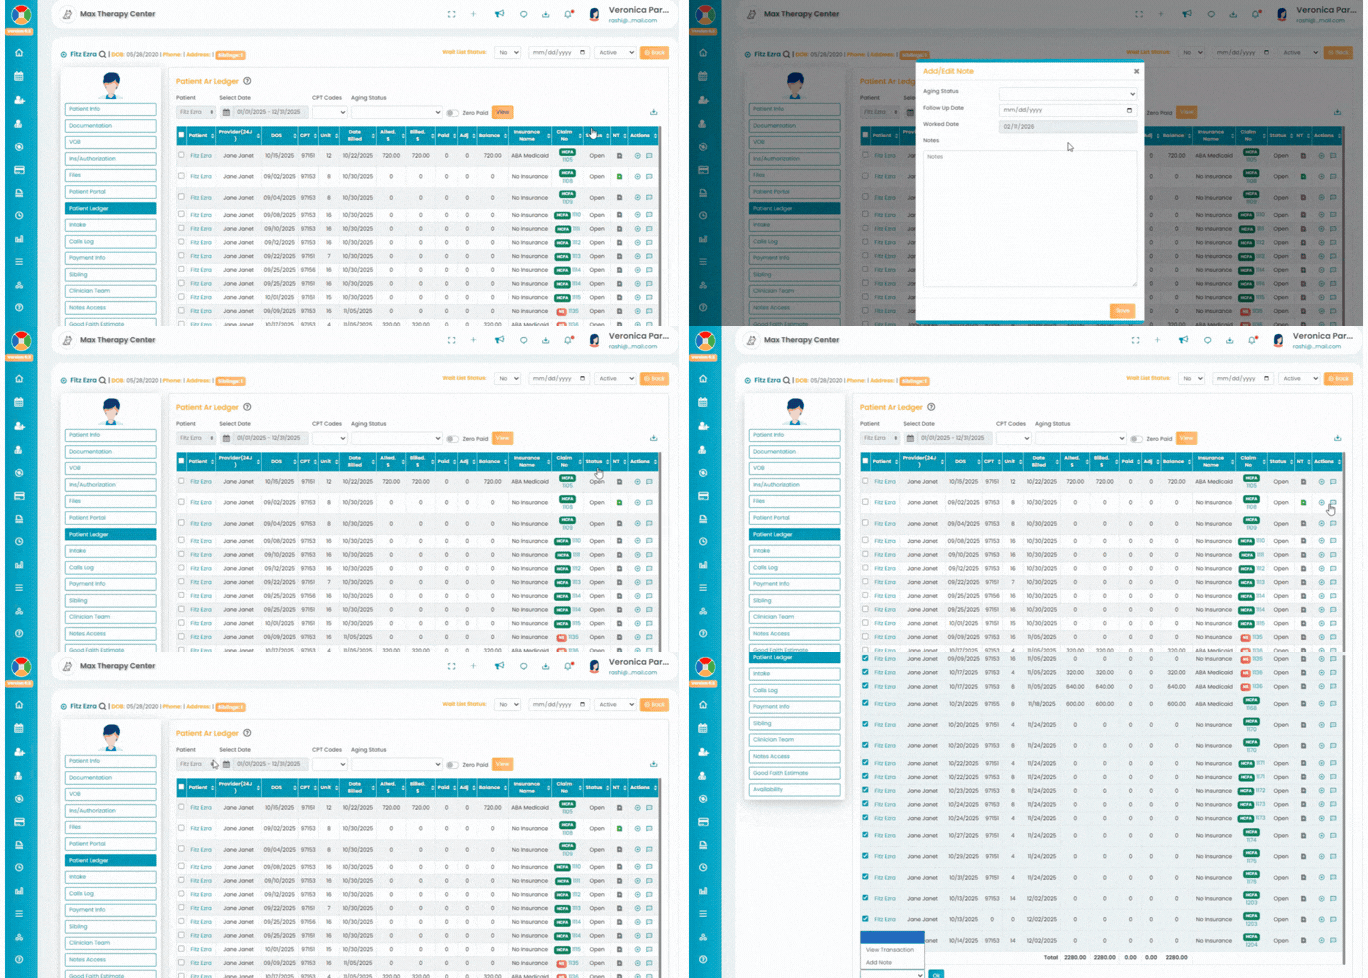
- After the AR ledger is generated, more options will be available to navigate the information.
- Under the action column (right), the user will be able to add notes or view follow-up:
- Click the “+” icon under the Action column to add notes. An Add/Edit Note pop-up will appear. Enter the details, including the status, aging follow-up date, and any side notes, then click Save.
- Click the note icon from the action column to view any AR follow comment from the team.
- Click the “+” icon under the Action column to add notes. An Add/Edit Note pop-up will appear. Enter the details, including the status, aging follow-up date, and any side notes, then click Save.
- Bulk manage claims by selecting multiple claims at once, then use the dropdown options below the table to apply updates.
- View transaction: Select any item from the list of generated ledgers. Then select the "view transaction" option and then click Go. The transaction details will be available below the drop-down option.
- Add note: Notes can be added.
